
Angular and Firebase — The Perfect Pair: Part 6

Last time we got a glimpse of Angular Material, Covalent, and SweetAlert2 with the sign-up and sign-in pages. We’re going to continue with that and create the rest of the app in this installment. I will warn you, that this article is a lot longer than previous articles and contain a lot of information as we’re going to finish up the app end deploy it. This will be the last part of the series, after this, we will have a fully functional app that you can use in the browser.
Firebase Functions

Sometimes we need some extra functionality to our apps. Cloud functions are a perfect way to add some extra functionality to handle extra functions. We’re going to initialize functions with a simple and familiar command.
You can read up on Firestore Triggers here but I’ll go over them quickly. Basically, the Firebase admin SDK gives us some amazing method that will trigger certain actions when something happens in our app, for example, executing a CRUD operation on Firestore. You’ll see how the function triggers work as we move on with the app. First, we have to initialize the functions in our project. Ideally, we would have this in a separate repository, but to make it easier for this instance it will be all in the same repository.
firebase init
Then we’re going to choose functions as the first options, Use an existing project and then select the project we want to initialize. For functions I always select Typescript
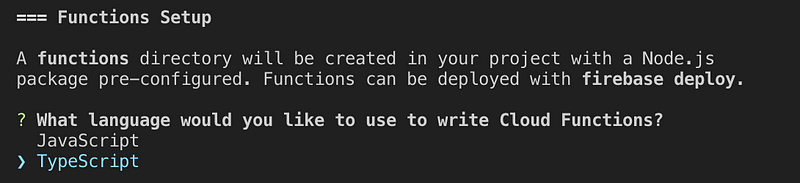
As well as using TSLint and pressing enter to accept the rest of the defaults.

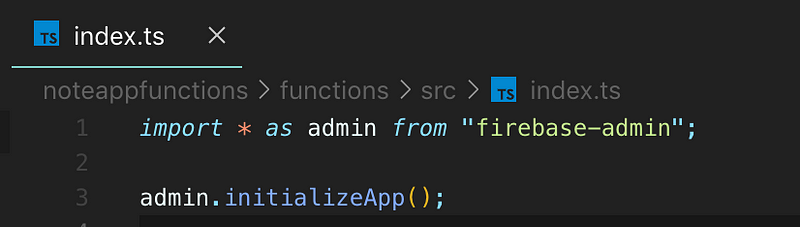
We’re going to need to install our data models library. After that, the very first thing we need to do is initialize the app in the index.ts file.
Users Functions
The second thing I always do is create a firestore directory and an index.ts file inside it. The first thing I’m going to create is a users.ts file where I’m going to create the triggers for the Users Firestore collection.
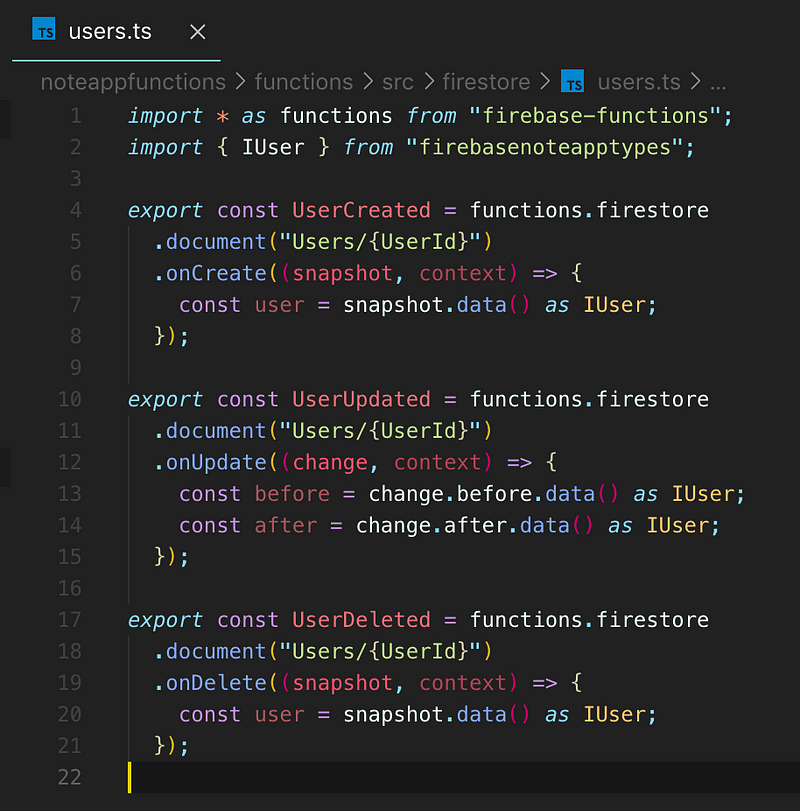
All of these functions react to a CRUD operation on the Users collection. The first will be triggered when a User document is created, the second will happen when a User document is updated, and the third will react to a User document is deleted. There is a TON of useful information that comes into these functions and we’re going to use a little bit of it. As you can see in the Create and Update triggers we can grab the IUser from the snapshot that comes in. In the Update function, we can also get the before and after snapshots of the IUser so that we can see what, specifically, has changed between the two. We aren’t using the context at the moment but you can see that we have a wild card in the path. The {UserId} is a placeholder for the actual user’s Id from Firestore (which will be the same Id used for Firebase Auth, which is why I made it that way) and we can access it from the context using context.params.<PLACEHOLDER NAME> or context.params.UserId.
We’re going to create some utility functions to deal with storage bucket items, we’ll need them later.
https://gist.github.com/shadow1349/3cd55eb8c4e2aad8d2a7df924c7994ad
Here are the rest of the initial functions
https://gist.github.com/shadow1349/8f53ba3ff5becd796d4cca5e26894f6c
As they are now, these aren’t doing anything that groundbreaking. They Are basically syncing data with the users Firebase auth entry. One useful function is that when a User document is deleted it will also trigger an action to delete their Firebase auth account. We’re going to add more to these later. The last thing we’re going to do to the User functions is export them from the main index.ts file.

This will make sure that our functions are actually able to be triggered by the Firebase Functions environment.
Note Functions
You may have noticed that in our model for IUser there is a property called NumNotes and we always initialize it to 0. As you can infer from context, this will be used to keep track of how many notes a user has. If you’re thinking that we could just read all the notes a user has available and count those you’d be technically correct that it is very much possible and not that difficult. The one downside of that method is that in order to get the count we ALWAYS have to read ALL the notes a user has, which can get expensive (monetarily) and exceed the free limit quite quickly if you’re not careful. You can watch a more in-depth video describing this here but I’ll quickly share the solution.
https://gist.github.com/shadow1349/8cf08f02b469c21b409b231391fed0ad
Firestore gives us these things called transactions. These are super useful for updating data safely, so while the transaction is happening nothing else is allowed to update this data until it is done. This ensures that the number of notifications won’t be modified outside of this operation. So as you can see, when we run a transaction we get the reference to the user document. This is made simple by adding the Author field to the Note. Once we have that we will first retrieve the current user so that we can get the current number of notes they have. Once we have that we will increase or decrease the number of notes they have by 1 based on whether the note is being created or deleted.
Deploying Functions
Do you remember how we deploy the Firestore rules? We’ll we’re going to use the exact same command to deploy the functions as well.
firebase deploy
The first time this runs it will be a little slow because it is initializing the environment and enabling resources for you.

You get some nice feedback from the console and you will be able to see and react to any errors right away. This will also handle updates for you as well and it makes the whole process as effortless as running a single command. If you go into the Firebase dashboard and go to your functions you will be able to see them there.
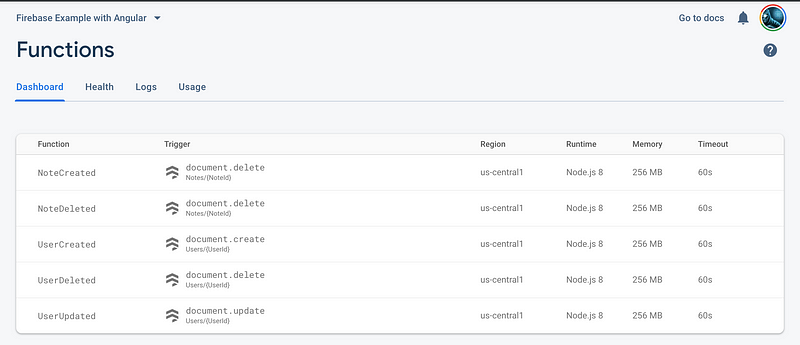
Once we start to test our app, I’ll get into using the Functions dashboard.
The Angular App
Now we need to create the rest of the Angular App. We already have all the auth pages settled, we just need a profile page and a notes page. We already have a path for the main notes page, now we just need a profile page. Creating the profile page is the same as any page we need to create the module with routing enabled, create the component for it, update the routing for the profile module, and then add it to the main routing module as we’ve done with modules in the past.
The Main Page
Just like the auth page, the main routes are rendered inside the main page, so we have an opportunity to do some universal layout here. We basically only have 2 routes for the main page, the notes, and the profile. So we’ll need a way to navigate between those two pages. Immediately a toolbar comes to mind.
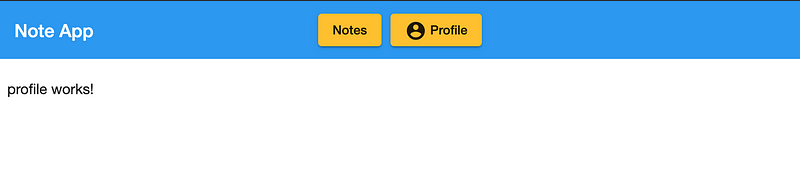
Ok, so I’ll be the first to admit, this isn’t really as nice looking as I had imagined. I could spend some time working on some custom styles to make this look a little nicer, but I had another idea that wouldn’t take me as long. If you’re a CSS ninja, then, by all means, tinker away, but for me, I think I’m going to create a side navigation bar. Angular Material gives us a component right off the bat and a little bit of CSS will go much farther. I think this is a more scalable solution as well because if we add more routes then we’re going to need more space that a toolbar just doesn’t provide.
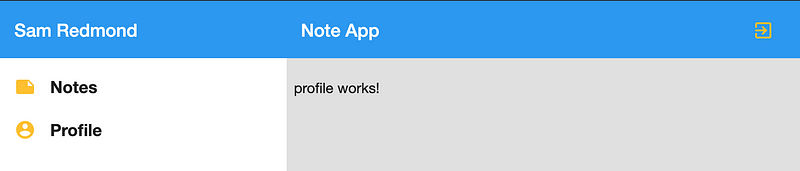
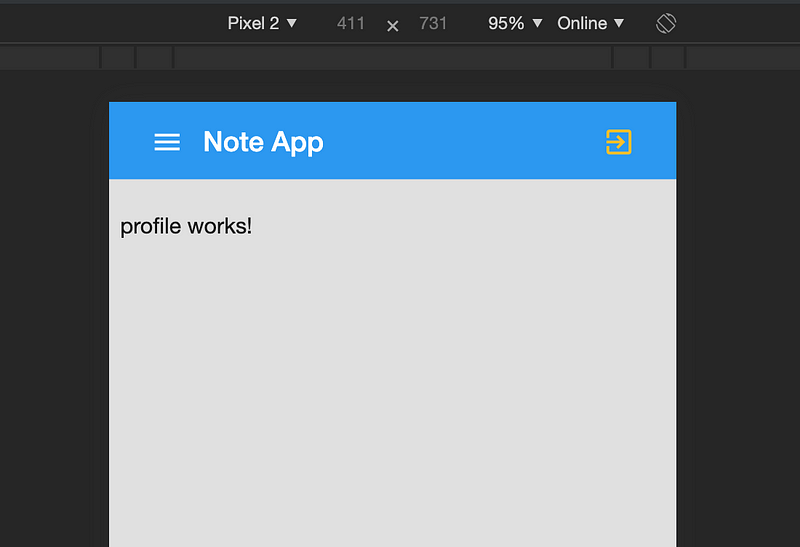
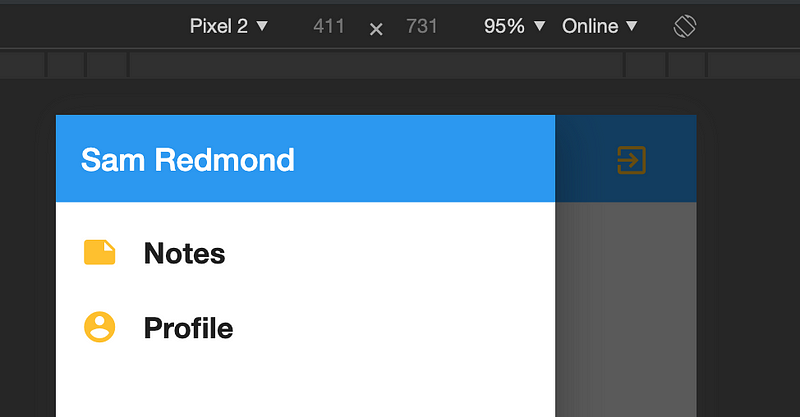
Now that looks quite a lot nicer, it’s a lot more scalable (like if we wanted to add more routes) and it’s more mobile-friendly.
Nice, so let’s get into how this actually works.
https://gist.github.com/shadow1349/2b7c49211dd059b8efff7baadb887b5b
In this example, we can get an idea of how we can use Firestore to get data into the front-end. As you can see, in main.component.html we are grabbing the user asynchronously and making sure that the user exists before rendering the screen, while simultaneously mapping it to a variable that we can use multiple times. If you look in main.component.ts you can see that the user is actually coming from our user service and in the screenshot, you can see it render the first and last name! This is now syncing with Firestore, so if the user were to go into Firestore to change their name it would reflect immediately in the DOM.
You can see the magic in action. The reason that we grab the user once and assign it to a new variable is that we only really want to subscribe to it once. This helps the performance of our site and helps to keep us within Firebase’s free limit for reads. This is the pattern we will be using throughout the rest of the app.
The Notes Page
Now, the main point of the whole app, the actual notes themselves. To keep things simple, I’m going to do a very basic layout for the notes, essentially keeping them in a single column. I could put them into a fancy grid, like Google Keep, but I want to keep this more focused on Firebase and Angular so a single column it is.
Before I get started I realize that I may need to create a shared custom component.
ng g m shared/note && ng g c shared/note
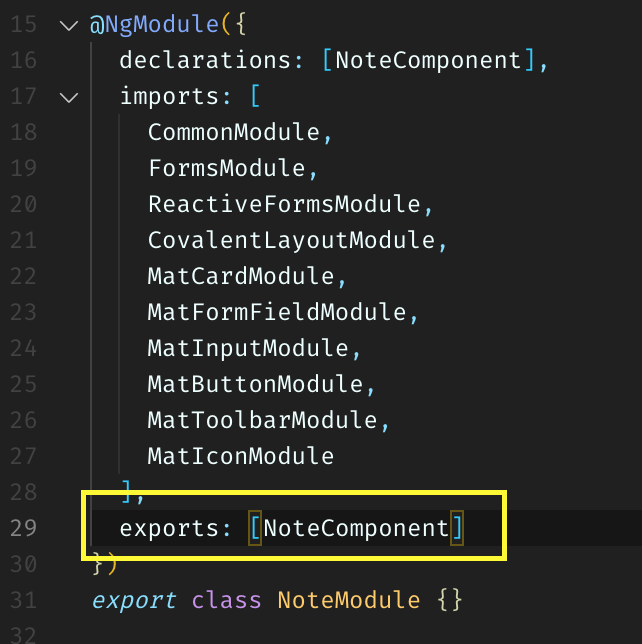
Since this is a shared component and not an actual route, there is no need for me to initialize routing, just the module. In order to be able to use this elsewhere in our app, we need to be able to import this module and somehow access the component. To accomplish this we need to create an exports array in the note.module.ts file.
Now we can go into /main/notes/notes.module.ts and import the NoteModule and we can go ahead and use <app-note></app-note> as much as we like. However, firest we actually have to make it do something.
I want this component to be able to take in a note and then create and update that note.
https://gist.github.com/shadow1349/159247b2c3935a8cf7d9840b712353e8
This is a simple component that will handle creating, updating, and deleting a note. However, it will not call any Firestore methods directly, rather, it will pass back an event that will then modify Firestore. While this COULD call Firestore methods from the NotesService directly, I think it’s better to handle these sorts of things in a central location, rather than in the individual component. This is a design choice and is entirely up to you when you’re making your app.
Moving on, we can see that an INote is passed into the component, but it’s optional. When there is no INote passed into the component it is assumed that we will want to create a new note and the DOM will handle it appropriately. If we do get a note then we will update the form fields with the current values so that if the user wants to edit the note they can, as well as canceling the edit and canceling the creation of a note.
Moving on to the actual notes route we will see that it is far less complex than the note component.
https://gist.github.com/shadow1349/e2b7823dede2452de074aabaccc996ff
This is also an interesting place where we will see our Firebase Functions take effect. If you notice we grab the current user and see how many notes are in the NumNotes field of the user document. If you remember the notes functions above we were running a transaction to make sure that when a note is created it will update the NumNotes field on the user document. Since the Observable of the user will get real-time updates when the function runs successfully the DOM will automatically receive that update. This will help us react to how many notes a user has and tell them how many notes they have at the top of the page.
You can see the fruits of our labor in action above. You will notice a small amount of latency with the functions that get much quicker by the end of the gif. That is actually a function cold start. So Firebase Functions are what you would call “serverless” which is a fancy term for functions as a service. A normal server application is always running so when you call it everything is humming along. Serverless functions aren’t actually running until you call them, then the environment for the function has to get spun up and then run your function and then it will go back to bed after it’s done. This is a small downside, but it can actually be a positive as well because the higher the load your functions have the better they’ll perform. So your app will scale effortlessly and actually be better off for it. However, you can see the cold start in action and it’s really not that slow at all.
The Profile Page
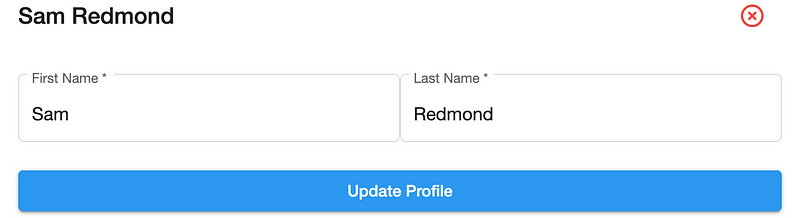
The last page we have to build before we deploy the app to Firebase Hosting is the profile page. This will just display some basic user information, allow a user to edit their information, add a profile photo, and change their password. Let’s have a look at what the finished product looks like and then we’ll explore how we got there.
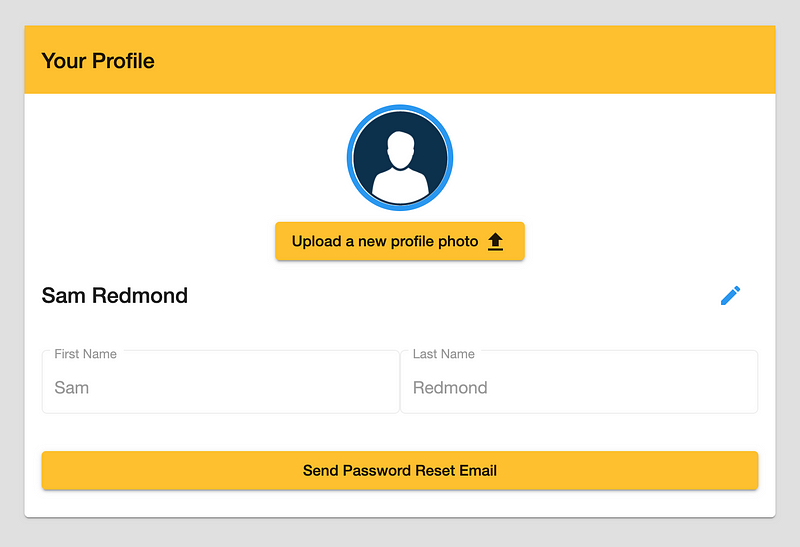
This is a very basic page. We didn’t really get a ton of information from the user that makes sense to be editable other than their name and profile photo so this is really all we need. Now let’s break down the code for it.
https://gist.github.com/shadow1349/819371943e41a8a36257310749a06fed
I made this a little different on purpose to show a more direct way to create pages. The Notes page was basically run by a shared component, which was nice for a lot of reasons. This page is a little different because it is all pretty self-contained. You can see that the first thing we do is grab the user Observable and map it to an object we can use. Then we either display the profile photo or the stock image you see above depending on whether the user has a profile photo or not.
Then we display the user’s first and last name along with an edit button and a form so they can edit their name. This form starts off being disabled, which is entirely controlled by the form group. You’ll also notice that there are some components that hide or display based on if the form group is disabled or not. When we click the edit button it will change the form group to enabled and show this.
When we click the cancel button, it’s back to being disabled. Lastly, we show a single button that allows the user to change their password, but you may notice that there is no corresponding form. That’s for a reason I’ll get into shortly.
In the profile.component.ts you’ll also notice that something is a little different. After creating the form group, we subscribe to the user so that we can store the first and last name in the form controls. We also add this subscription to a Subscription class. Rather than using the OnInit lifecycle hook we are instead implementing the OnDestroy lifecycle method and unsubscribing from the subscription. As the name suggests, OnDestroy runs when the component is destroyed, which likely means we’ve navigated away from the page. It’s always best practice to make sure you unsubscribe from all manually created subscriptions to avoid memory leaks. We don’t need to worry about that when we use the async method in the DOM because that automatically unsubscribes for us.
If you remember from when we created the UserService we were taking in a whole IUser object into that class, but you may notice we’re not exactly following that here, so what gives? I’ve changed it up a little to better fit with how we’re implementing the profile.
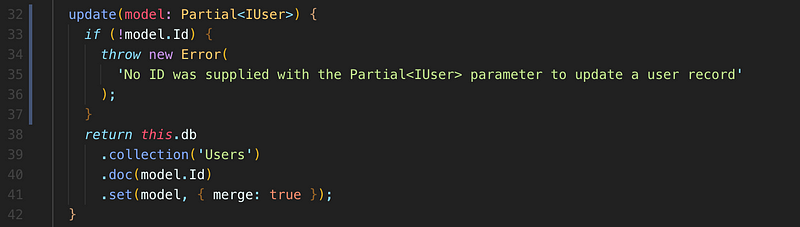
The only changes I’ve made are making sure that the update method takes a partial IUser which makes all the fields optional. I have also added in a check to make sure that we always pass in an Id with the model so ensure that we always have an Id or the app gives us an error that we will easily recognize. Since we’re using the .set method with the merge option set to true we can pass in a partial user like we’re doing to update the first and last name and it will ONLY update the fields that have changed.
We also have 2 new methods that we have to talk about, which is the change profile photo and change password methods. First up, let’s go over the change profile method.
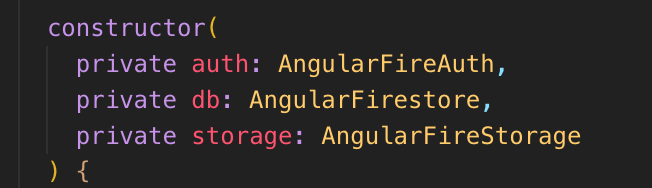
When we first integrated Firebase into the app we initialized the AngularFireStorageModule but we haven’t used it until now. If you look at the code in the profile component TypeScript file as well as the HTML file you’ll notice that we actually have a file input. The file-input class just hides the input so we don’t see it. The reason for that is that the Angular Material buttons don’t come with their own file input button. Some of you may be on the Covalent docs and notice that Covalent actually does have a file input button, but we don’t actually have to use it here. We can give the file input an id and then trigger the click when the Angular Material button is clicked. This will open the file system for us to select an image. Once we select a photo it will be passed into our function as a FileList object. The first thing we do is check to make sure that there is only a single file in this object, since we will only really need a single image for a profile photo. Then we check to ensure that the uploaded file is actually an image. Lastly, we pass along the user’s id as well as the file to be uploaded to the user service. We’ve imported the AngularFireStorage library and added a new method to the user service to handle this.
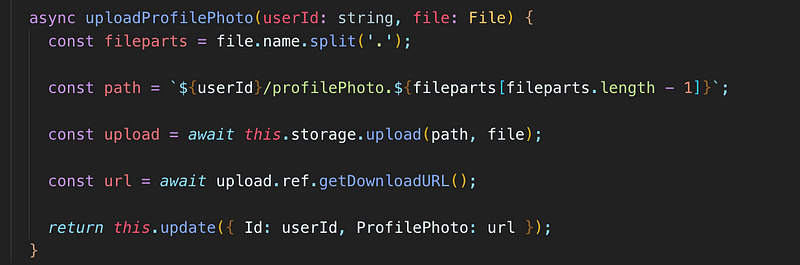
It’s a very simple method, the first thing it does is split the file name by and use the last item in the array, which will be the file extension to specify a path to the file. We’ll then use the storage library to upload to file to the specified path. Once that has been uploaded we can get the URL from the response and then call our nifty update method.
You can see it in action with this short GIF. If we go into FirebaseStorage we will be able to see the uploaded file.
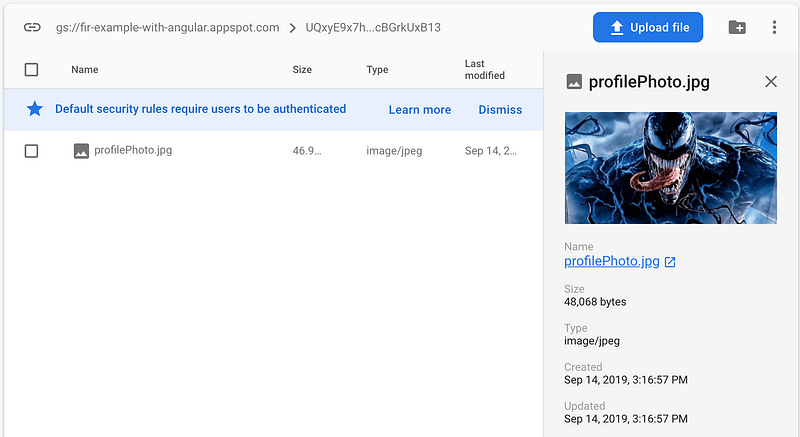
You have probably noticed that we are using the user’s Id as a path and can see that the image gets uploaded to this path. The reason we do this is to make sure that each file has a unique path to go to. If we don’t specify unique paths the file will be overwritten. We also use this fact to our advantage by always uploading images to the exact same file path every time. This makes sure that we don’t end up with a boat-load of old profile photos. There is one case where we may end up with multiple profile photos, and that is if the file extension is different. For example, we can see that the one we just uploaded is a JPEG, but what if we upload a PNG or a GIF? That is why we added those helper methods to the functions. Every time we upload a photo, the user document will be updated with the new URL. When that happens our UserUpdated method will be called and it will check to see if the previous file matches the new file. If they don’t match the old one will be deleted. Thus, cleaning up old profile photos. I’d like to mention that this is not necessary, maybe you want to keep all the files a user uploads, and that’s fine too. But if you’re looking to make your Firebase storage system a little cleaner, this is a good way to go. I should mention that this will also save you some money once your app scales. For example, if you have 1 million users each uploading multiple profile photos you aren’t going to want to be responsible for all those old photos.
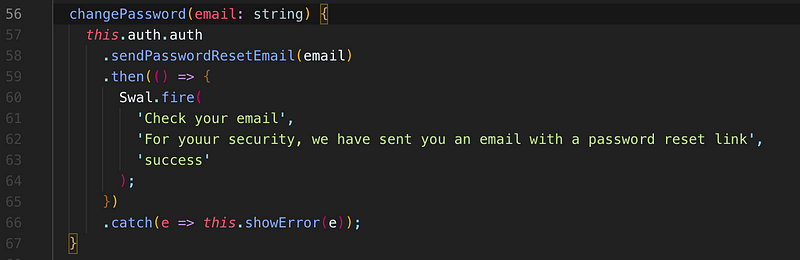
Lastly, we’ve got to talk about the password change function. I mentioned there is no corresponding form for that, and that’s because Firebase takes care of that for us. You may have noticed that I have added another method to the auth service.
As the Firebase method implies it will send an email to you.
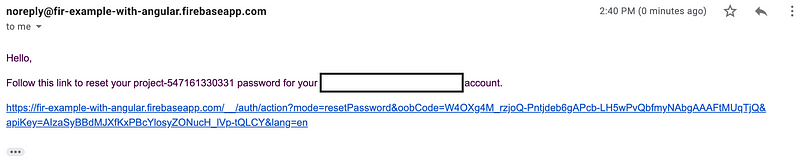
This will give you a super basic change password email, but what happens when we click the link. I have not built anything special around this whatsoever, but Firebase will handle it for you.
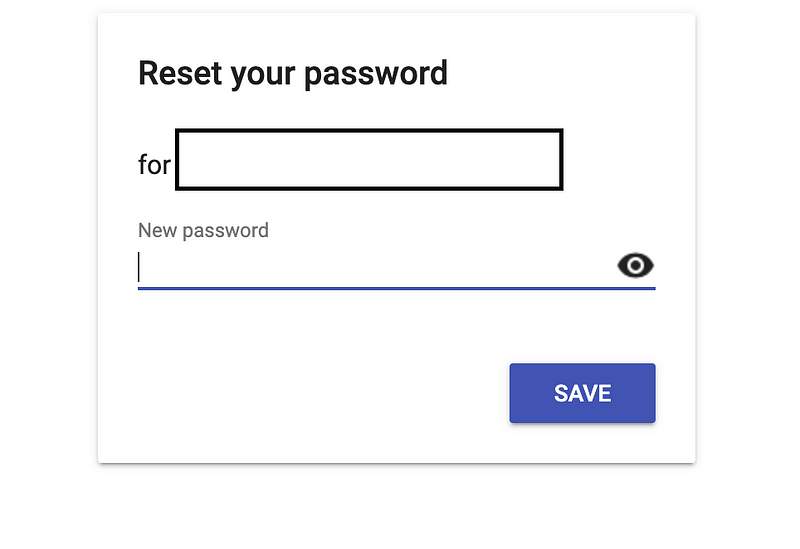
This is the page that you will see, and it will basically just ask for a new password, and then you’re set! Once you set your new password and try to click on it again, it won’t actually work.
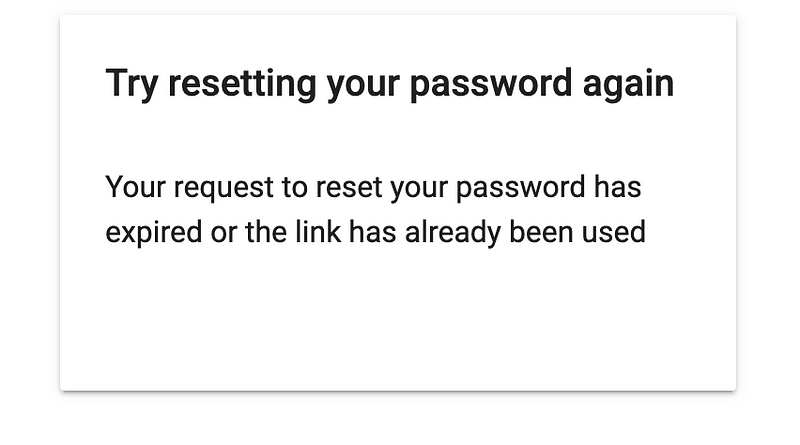
For security, it will block all password reset links that you’ve used. You may be thinking that the email looks bad and you wish you could change it. Well, you’re in luck because you can change it in the Firebase dashboard under Authentication click on the Templates tab.
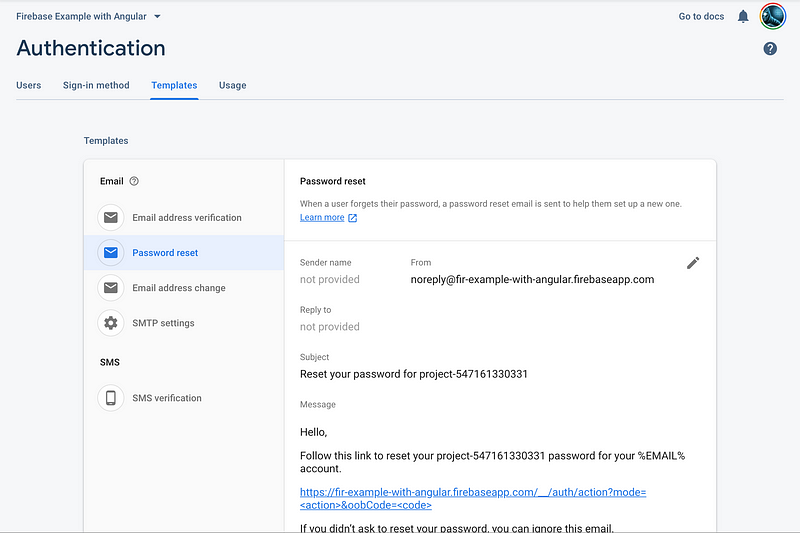
Then you can see all the available emails that are sent out by Firebase. You can edit the emails as much as you’d like and Firebase even lets you change the From email address to be a custom email address.
If you didn’t want people redirected to a pre-built Firebase page there are plenty of ways you can redirect people to your website with your own custom form, but I won’t get into that here, it’s a topic for another article.
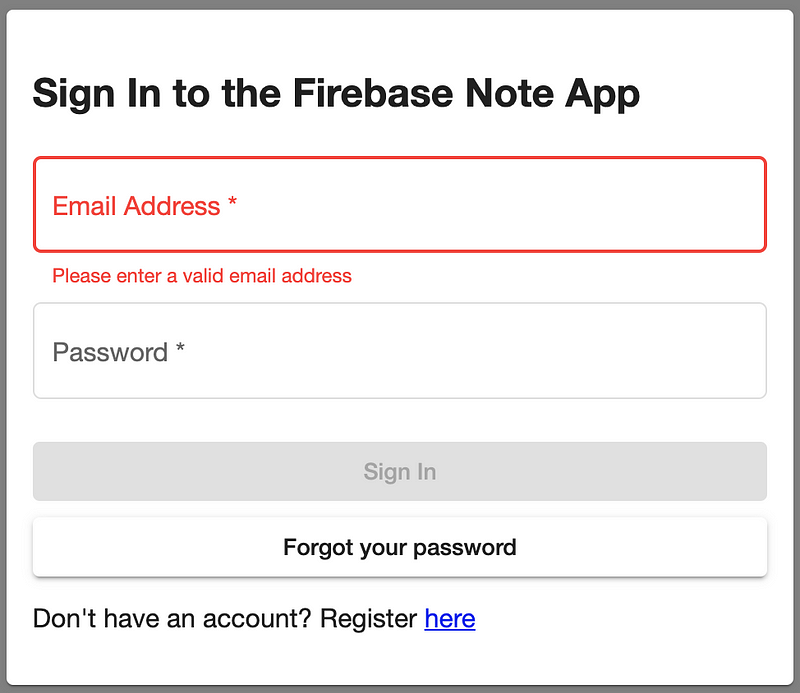
There was one thing I missed when we set up auth, what happens when you forget your password?! If you remember the changePassword method we used earlier it just takes in an email address and does not require the user to be authenticated. We can simply add a forgot password button and use the changePassword() method from auth to hook that up.

Now we have a fully working application and we’re ready for deployment!
Deploying the App
Now that our application is complete, we can deploy it to Firebase Hosting. Before we do that, we have to change the outDir in angular.json to be dist. Then we have to run the familiar firebase init command and select hosting this time.

Firebase Hosting will try to initialize the public directory as public but we want it to be dist like we specified in angular.json.

Then we want to select y to make sure that all URLs are written to index.html. We do that because Angular is an SPA (Single Page App) so everything is loaded into index.html and the routes are basically virtual routes handled only by the Angular router. You’ll notice that it puts a dist folder in your project, but don’t worry when we build our app that will be overwritten. Once that command has finished we can then build our app.
ng build --prod --aot
This tells the Angular CLI to build the app for a production deployment, which will also use theenvironment.prod.ts everywhere we import the environment. This is useful when you have a dev/staging/prod and want to easily switch between the two. The --aot command uses the Ahead Of Time compiler, which is just a nice option to have for performance. Once that has been able to build we can now run the familiar deploy command.
firebase deploy
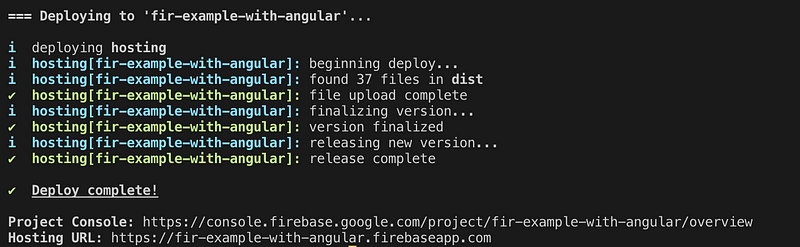
As you can see we now have a fully working app you can visit here. Feel free to create an account, add some notes, change your profile around a bit, whatever you want.
One really cool this about Firebase Hosting is that, like Firestore Functions, it will keep a version history of every deployment.
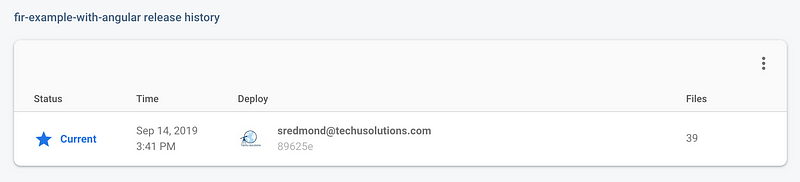
If you wanted to revert a deployment you can go back in time to any other deployment you want without ever having to touch a Git repo. You’ll also notice that the app gets an SSL certificate right off the bat as well.
Adding a Custom Domain
I know you may be thinking that this is all well and good, but what if I want to use my own domain name? Don’t fret, there is an option for you. First, you have to make sure you can edit the DNS settings on your domain. I’m using Google Domains, but this will work the same with any registrar. The first thing you have to do is set get the DNS records you need to add from the Firebase dashboard by clicking the Connect Domain button.
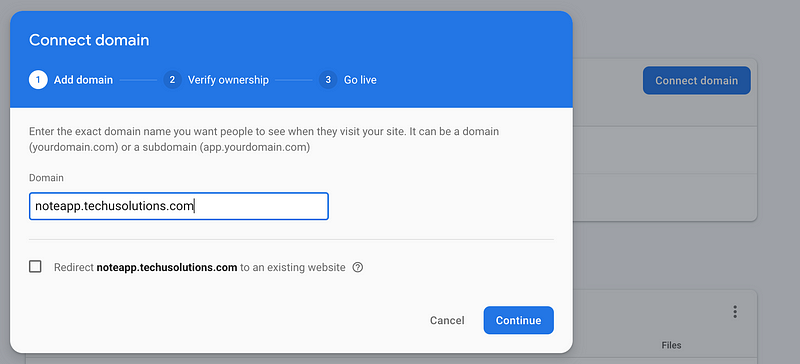
Then you have to enter your domain name and click continue.
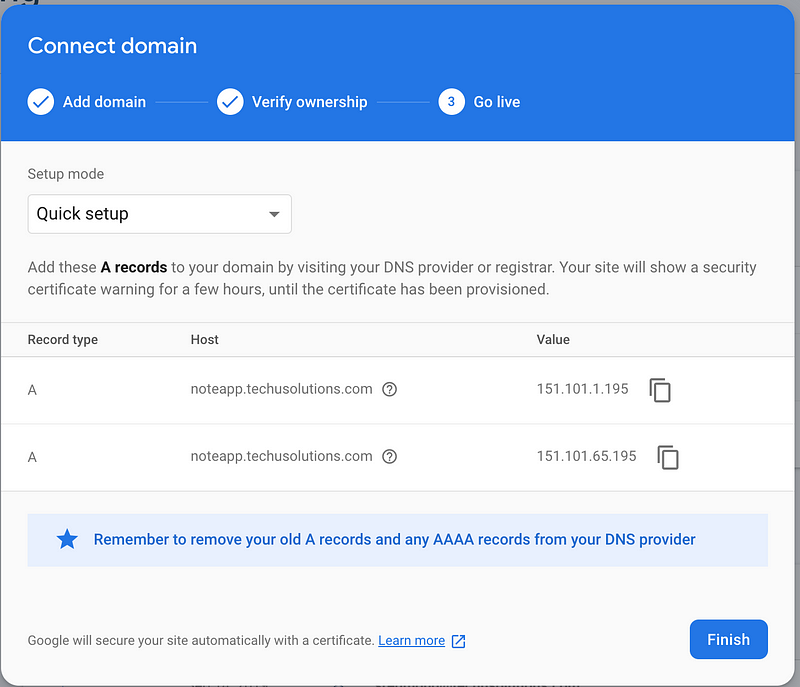
This is the important information you’ll need, and I’ll show you how to add it to your DNS. For me, I go into the DNS settings on Google Domains and add a new Custom resource record, but if you’re using another registrar you just need to find out where to add a new A record.
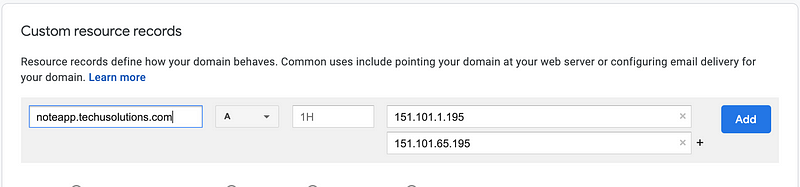
Once you’ve got that you need to enter both IP records that Firebase gives you. Click the add button and now you’re good to go. Click the Finish button in the Firebase hosting dashboard and you’re done. If you reproduce this with your own custom app and it doesn’t show immediately don’t worry. It can take anywhere from 12 to 24 hours for the DNS records to propagate, so just be patient. While you’re waiting, feel free to go to https://noteapp.techusolutions.com and play with the app a little bit. You’ll also notice that my custom domain also has an SSL certificate. However, I did not buy an SSL certificate or do anything special to set that up. Even when you set up a custom domain Firebase will hook you up with an SSL cert FOR FREE. Yes, your eyes are working perfectly, your SSL cert if FREE.
Firebase Pricing
I would really like to give a shout out to the Firebase team for creating such an incredible and intuitive product. I have not taken my app off of the free tier while creating it, which is really kind of amazing. Everything you’ve seen in this article is completely free for anyone who wants to try it out. The only catch is that the free tier will not last you for forever. Eventually, you’ll have to upgrade your app. If you do get to that point, I would recommend the Blaze Plan. You can check out pricing for the Blaze Plan here. This is basically a pay-as-you-go plan, that has it’s own free tier that is even better than the free plan. I have several projects using the Blaze Plan and I haven’t paid a single cent for any of them because they’ve all stayed in the realm of Blaze free tier.
Moving Forward
This is the last chapter in this series. In the future, I will use this app to expand on other ideas around web development with Angular, Firebase, and other 3rd party tools. I hope that everyone has enjoyed learning a little bit about Angular and Firebase and that you can all go out and explore these amazing technologies a little more!
If you’ve enjoyed this article I’d love for you to join my mailing list where I send out additional tips & tricks!
If you found this article helpful, interesting, or entertaining buy me a coffee to help me continue to put out content!

📝 Read this story later in Journal.
👩💻 Wake up every Sunday morning to the week’s most noteworthy stories in Tech waiting in your inbox. Read the Noteworthy in Tech newsletter.