Angular Basics: Using Forms in Angular
Today we’re going to be going through the basics of Angular forms. We’ve seen some form handling in previous articles, but today I want to give a more in-depth look at forms in the Angular ecosystem. If you’re unfamiliar with Angular, I’d highly recommend reading my Angular Beginner’s article. It will get you up to speed with Angular and how to create a project and components. If you want to follow along with this article I would recommend that you create your own Angular project. With that out of the way, let’s get into it!
The Basics of Angular Forms
In any Angular project, you can use two types of approaches to creating forms
AngularJS made use of template-driven forms quite a lot using the ng-model directive. I’m not going to get too far into template-driven forms because Angular 2 introduced Reactive Forms which we’re going to use today. We can combine the two approaches in Angular to give us the best of both worlds.
Before we get into the code let’s ask a question. What is a Reactive Form and how is it different from a Template Driven Form? A Reactive Form is based on using a model to handle forms. This would be a FormGroup or a FormControl that we create inside out typescript files. The idea is that this model will help us better organize and manage our forms. The forms will have data that changes over time so we will want to be able to predictably and accurately react to changes in the forms.
On the other hand, you have template-driven forms which just bind your form to a value. It won’t really help you as much with grouping and managing forms or validating those forms.
Let’s see how it work. In the App Module, you’re going to want to include the Forms Module and Reactive Forms Module inside your imports array.
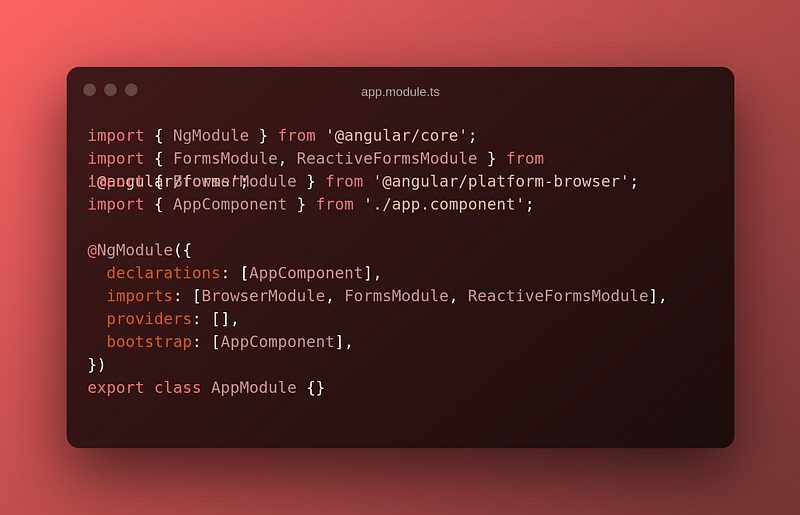
The Forms Module will give us the ability to use template-driven forms and the Reactive Forms Module will allow us to bind our forms to the models that we’re going to create. Let’s have a look at what this looks like.
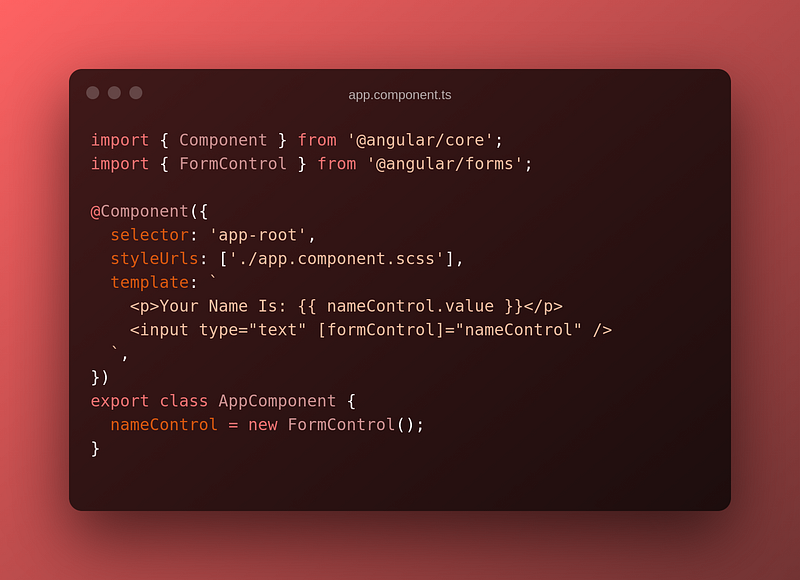
This is our most basic Reactive Form. We have a model called nameControl that is a basic FormControl. We can then bind to the value of nameControl in our template to display the value.
What happens when we have multiple fields we may want to manage? That’s easy to do with a FormGroup.
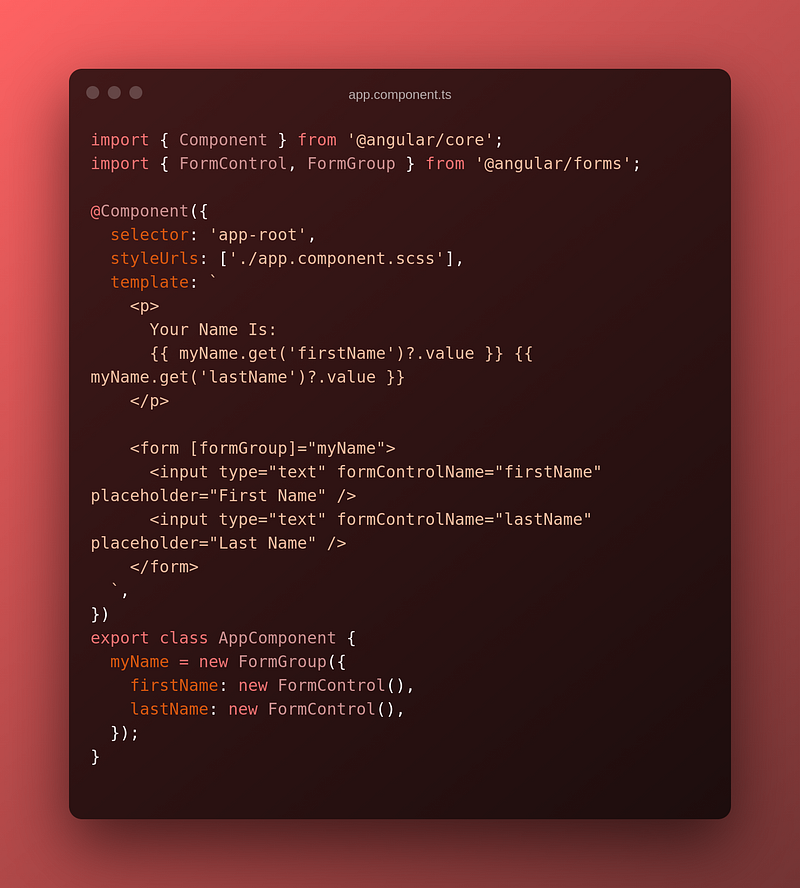
This allows us to group data and more effectively model real-world forms. You can also see that we are able to hook into these values just the same as we would normally.
Form Validation
Having these forms is great, but how do we do validation? Also what kinds of validations are available to us?
First, let’s see how we can do some validation. Let’s say we want to have the first name be required, but the last name is optional.
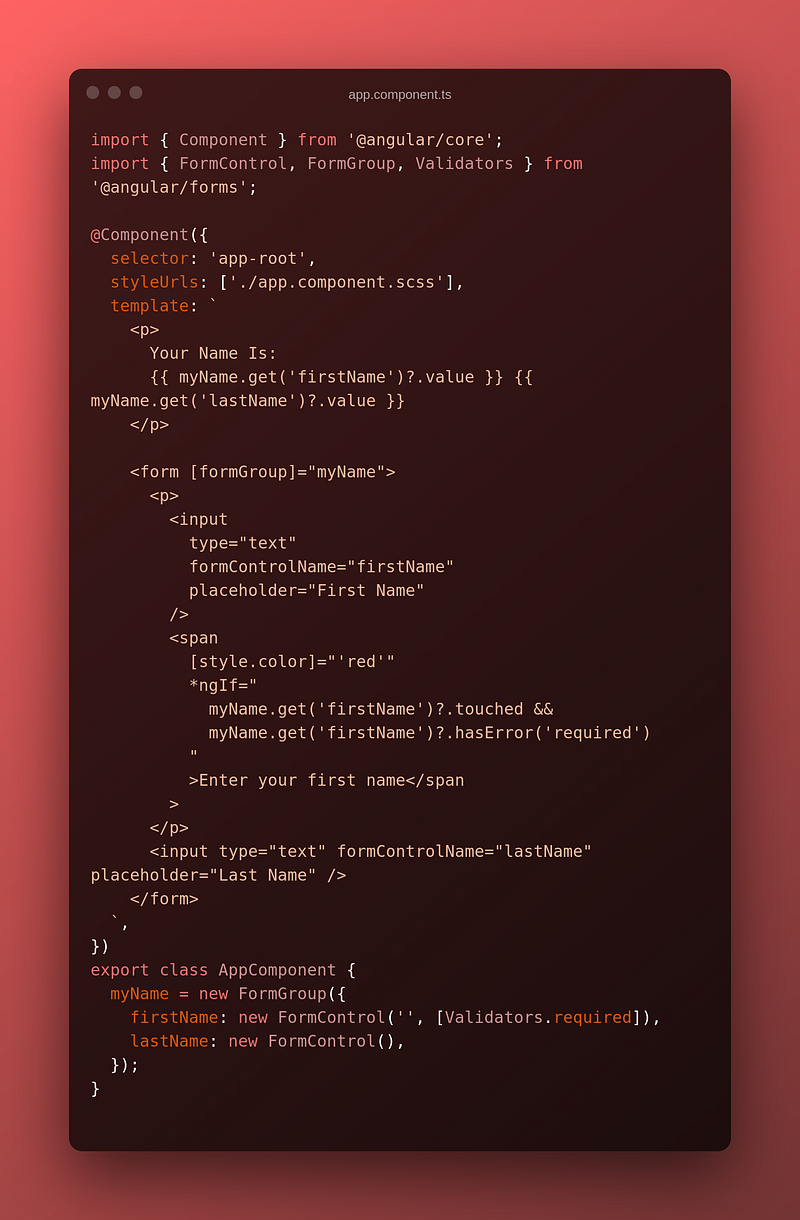
This is a pretty basic setup but it will give us a couple of things. The first thing is that we can set the initial value of the FormControl. Then we can give an array of Validators. In this case, we’re using the required form validator. Then in the template, we can see if the control has been touched and if it has any validation errors. If it does, we can display an error. As a note, if you’re using a library like Angular Material, it will check if the form has been touched for you.
Now we can set default values and we can check for validation errors. What kinds of validation are available to us? Pretty much any kind of validation you want to do! There is a slew of built-in validators like required, email, min length, max length, etc. If you want to read more about form validation, the Angular documentation is pretty comprehensive.
Custom Form Validation
Aside from the built-in validation, you can do custom form validation as well. If we look at the Angular documentation above, it gives us a forbidden name validator so let’s use that.
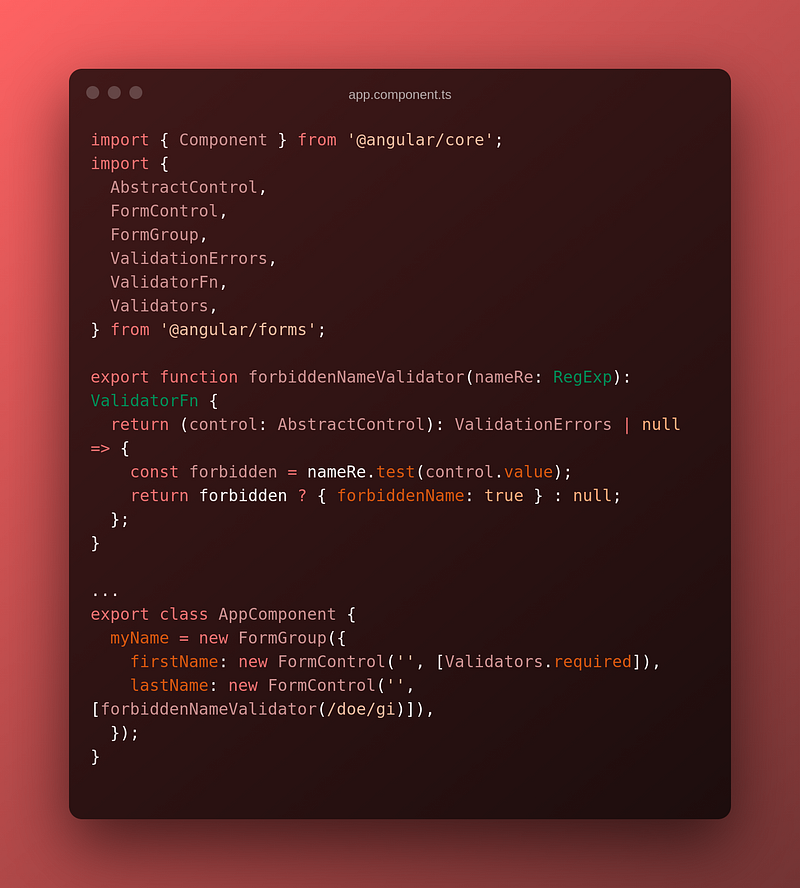
I’ve modified this slightly to return a boolean with the forbiddenName key to keep this a little more simple. Then we can use this inside the last name control to restrict the usage of the name Doe. Then we can hook into the forbiddenName key the same way we do with the required key.
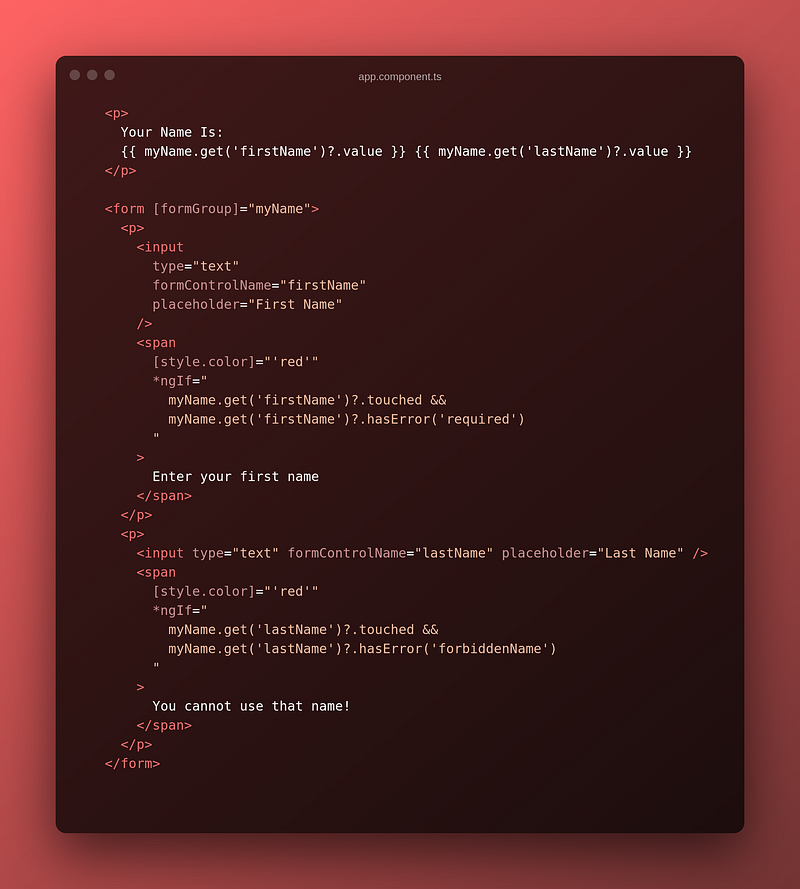
Let’s see what this looks like in practice.
As you can see, it successfully restricts the name that we specify in the function!
Wrapping it up
That’s about it for this article. I will do more with forms later on, but this is a really good introduction to form handling in Angular. I really like the way Reactive Forms work in Angular. I enjoy creating models that control the forms from the controller end; it gives me a lot more control over the forms and the data they take in.
If you’ve enjoyed this article, I’d love for you to join my mailing list, where I send out additional tips, tricks, and newsletters!