
Creating a Backend API with TypeScript and Express
One of the things I absolutely love about NodeJS is that it allows you to write every part of a full-stack web application in the same language. This gives you a ton of advantages in terms of ease of development, maintainability, and the ability to share code.
Today I wanted to talk about creating a back-end API using Express and TypeScript. We’re going to create a brand-new NodeJS application and integrate TypeScript and express. Our API will be very simple, it’ll just manage a list of ToDo items for us.
If you’d like to see the full code it’s all posted on GitHub, the link will be at the end of the article.
Creating a new NodeJS Application
The first thing we need is a NodeJS application, which is easy enough.
npm initThis command will ask you a bunch of questions and will use the information to generate a package.json
{
  "name": "express-and-typescript",
  "version": "1.0.0",
  "description": "",
  "main": "dist/index.js",
  "scripts": {
    "test": "echo \"Error: no test specified\" && exit 1"
  },
  "author": "",
  "license": "ISC"
}
One important thing we’ll look at in more detail later is the main being “dist/index.js”. Otherwise, you can just leave everything else as default.
Installing Dependencies
The next thing we need to do is install our dependencies. For this project we have a couple of different dependencies.
npm i express cors body-parserThis will install express as well as some additions to express like cors and the body-parser. Now we need to install the dev dependencies.
npm i -D typescript @types/node @types/express @types/cors @types/body-parerSince we’re using TypeScript we’ll need to install it as a dev dependency as well as the types for Node as well as the types for our other dependencies. The types allow our editor to do type-checking making development a lot easier and making it easier for our compiler to catch bugs before we release them.
Configure TypeScript
Now that we have a project and all our dependencies are installed we need to configure TypeScript. TypeScript is a super-script of JavaScript, it’s a higher-level programming language. That means that our TypeScript code needs to compile (technically it’s transpile) to JavaScript code. This step configures how we want TypeScript to do that. Luckily, it’s pretty simple.
Before you do this, if you don’t already you need to have TypeScript installed globally on your system.
npm i -g typescriptNow, make sure you’re running this in your project directory.
tsc --initThat’s it! That command will generate a large tsconfig file.
You can also copy/paste this into a file called tsconfig.json. We’re going to want to uncomment the “outdir” option in the compiler options and we’re going to change that to “dist”. We can delete all the commented-out options, we don’t really need those.
These are just compiler options; we still need to add a little something. Under of the compiler options we need to add and array called “include” where we will tell the compiler where to find our code and we’re going to put “src/**/*” in the array. After everything is said and done, we should have a file that looks like this.
Now we can create a folder called “src” in our root directory and we’ll add a file called index.ts. In that file we’ll add
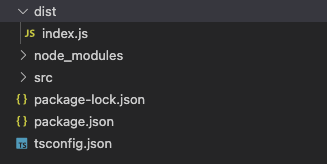
console.log('hello world');Now we can test our TypeScript compiler by running “tsc” in our console. We should see our dist folder with index.js in it.
Now we know that everything is properly configured and we can start writing our code.
Express Setup
Now we can start to configure express. Before we do that we’re going to add a script to our package.json called start.
  "scripts": {
    "start": "tsc && node dist/index.js"
  },
This is going to build and start our express app and all we have to do is run npm run start.
Now we can add our initial code.
import express from "express";
import bodyParser from "body-parser";
import cors from "cors";

const app = express();
app.use(cors());
app.use(bodyParser.json());

app.listen(3000, () => {
  console.log("Express server started on port 3000");
});
This sets us up for a basic express application. We have a cors configuration and it configures the body-parser to ensure that we can communicate in JSON.
If we use our start script, we can see that our application gets started on our local port 3000. As a note, port 3000 is nothing special you can use any port you want.
Writing Express Endpoints
Now, we can actually write an express endpoint. Let’s make a test endpoint to see how everything is working.
app.get("/", (req, res) => {
  return res.status(200).send({ response: "Hello World!" });
});
This is a basic route that will just return a JSON object to the user. We can test this in a number of different ways. We can make a curl request, and we can use Postman, but I like Insomnia REST. Let’s make that request.

We make a GET request to localhost on port 3000 and we get the response we hardcoded. Now we have verified that express is fully functional and we can make requests to our API.
Expanding our API
Let’s start to make our ToDo API. Since we’re using TypeScript let’s get the most out of it. We’re going to make an interface that describes a ToDo Item.

Typically you’d have a dedicated place to store your data, like a database. However, in our case, we’re just going to store all the data locally in a variable.

Now we can make two endpoints that both retrieve and populate the array.

We have a GET endpoint that just sends all the items at once and a POST endpoint that takes in a provided item and adds it to the array. Once it is done adding the item, it will send back the array with the new item added.
Let’s use Insomnia to test our API. Before we can test GET we should probably have something to GET.

The first thing we’re going to do is POST a new item into our array. WE can see that we receive an array with a single item, which means our API is working as expected. You may notice that we never send an ID, but we get one back in the response. Let’s look at the code for that again.

You can see in the endpoint that if we never receive an ID we create one by generating a random number. Typically whatever database you’re using would do this for you, but since we’re not using a database the onus falls on us. Let’s test our GET request now.

It looks like we are also able to retrieve our ToDo list as well.
These are good, but we might also want some more specific endpoints. What if we want our API to retrieve a single item by the ID?

This is a good example of an endpoint with a parameter. When we use an endpoint with “/:id” we are saying that the ID passed in could be anything. If you look at the first line of the function you’ll notice that we’re able to retrieve that passed in value using req.params.id. You may also notice that we’re using the parseInt function on it. That’s because anything passed in the router params will be a string, but our IDs are numbers.
If we don’t find the item at the specified ID then we go ahead and return a 404. Let’s give it a try. First, we’ll add a few ToDo items.

Now we’ll try and retrieve Item 2 by its ID.

As you can see, rather than an array, we get back a ToDo object. What if we ask for an item that doesn’t exist?

As you can see, our 404 works perfectly. Since there is no item with the ID 123 it will return an appropriate error response.
What if we want to modify an existing item? This topic is somewhat debated, and I have no hard feeling one way or another but we’d do a PUT call to update a single item.

The thinking goes that you’d POST to add to a list and PUT to modify a single item in the list. So we’re going to use our router parameters to pass in an ID to find which item we want to modify as well as pass in an updated item in the body of the request so we can modify the parts of the item we want.
Before we go ahead and update a part of the item we check to ensure that the updated item has that part as well. Otherwise, we might end up accidentally removing parts of the items. Let’s test it out.

We want to take one of our items and update it so that we can mark it as done. That’s all working as expected.
The last thing we need to do is add an endpoint for deleting an item. We can do this really simply by adding a DELETE endpoint with an ID in the router parameter.

This will take in an ID and look for an index within the array. If we don’t find that index then we’ll return a 404 error. When we find the index we will splice the array, removing the item at the index, and then return the new list of items without the item we removed.

Now we have a fully functional API that we can use to create a front-end for.
Wrapping it up
Express is a great framework for building an API. I’ll look at some others as well, but express is one of the oldest and is very much tried and true. Pairing express with TypeScript gives us major advantages. When we’re working with types, like a ToDo item, we can see that it makes our lives easier in a couple of ways. It provides us with type-checking so that we know exactly what a ToDo item looks like and what it contains. That allows us to check for variables that a ToDo item might have and if we miss one or try to declare one that isn’t there the compiler will give us an error.
Here’s a link to the full code:
GitHub - shadow1349/creating-a-backend-api-with-typescript-and-express