
Angular and Firebase — The Perfect Pair: Part 1
I’ve written a couple of articles about Firebase and now I want to get into why I think that Angular and Firebase are the absolute perfect pairing for a top-notch web app. What better way to do this than to get down and dirty with these amazing technologies by creating our own app. This is going to be a series where I will go through creating a full web application. In this first part, I am going to tell you what Firebase is and then we’re going to get into creating the Firebase project and starting the web app.
Firebase
If you haven’t used Firebase yet, I HIGHLY recommend you give it a try. Firebase is a back-end as a service, providing you all the tools to completely abstract away your back end. Firebase gives you authentication, custom functions, 2 different NoSQL databases, file storage, static site hosting (with a free SSL certificate), easily to implement machine learning, all the analytics you could possibly want, cloud messaging (ability to work in push notifications to web and mobile platforms), and a whole lot more that I won’t get into for the sake of brevity.
All of these offerings I’ve mentioned are amazingly easy to use and integrate into an existing app and just as easy if you’re starting from scratch. Whether you’re building a native mobile app, hybrid app, web app, or a video game Firebase has easy to use SDKs in almost any language.
In the context of this article, I will only be covering web app creation with Angular and Firebase, but you can easily use the techniques here on any platform you’re building for.
Creating a Web App

Web apps are amazing because of how flexible they are. They can be used on any device with an internet connection. With PWAs we can even take our web app and give users a semi-native app experience.
Rather than just talk about it, today we’re going to create an actual app using Angular and Firebase. At the end of this series, we will have a fully functional application that will be hosted on Firebase that everyone can use.
To get started we’re going to build a note-taking app similar to Google Keep. This article will only talk about setting up your Firebase project. In the next article we’re going to talk about the Firebase CLI and we’re going to create the Firestore rules.
Creating the Firebase Project
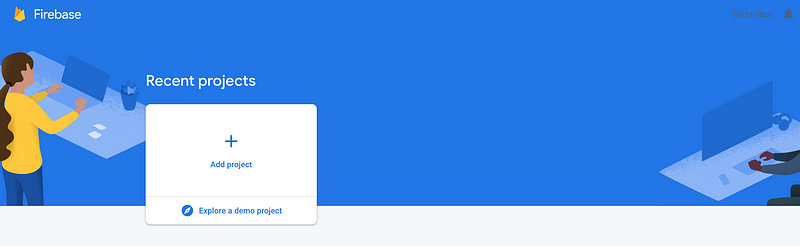
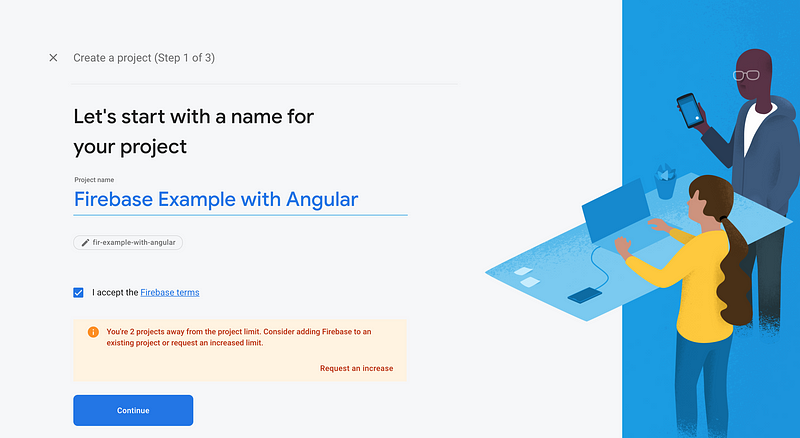
The first thing we’re going to do is go to the Firebase dashboard. If you don’t have an account, you’ll have to create one, but then you’ll get the page above. Next thing to do is enter the required information.
Then we can opt into Google Analytics or not. I’m just going to keep the defaults and move on.
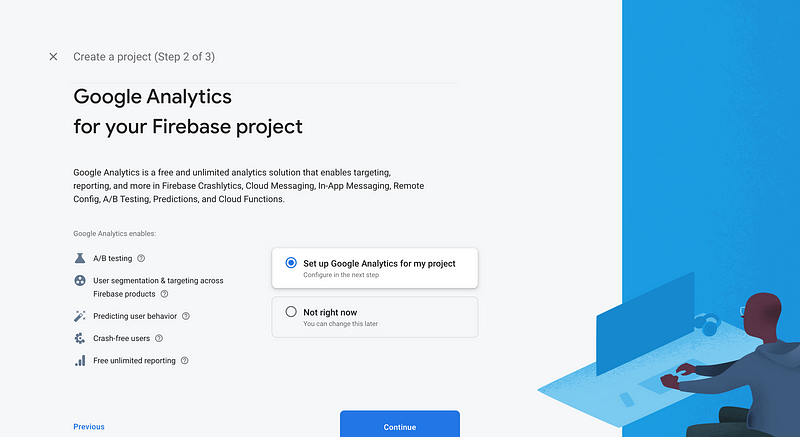
The next thing to do is to select the Google Analytics project to use and then we can create our project. Once the project has been successfully created then we will see a success screen.
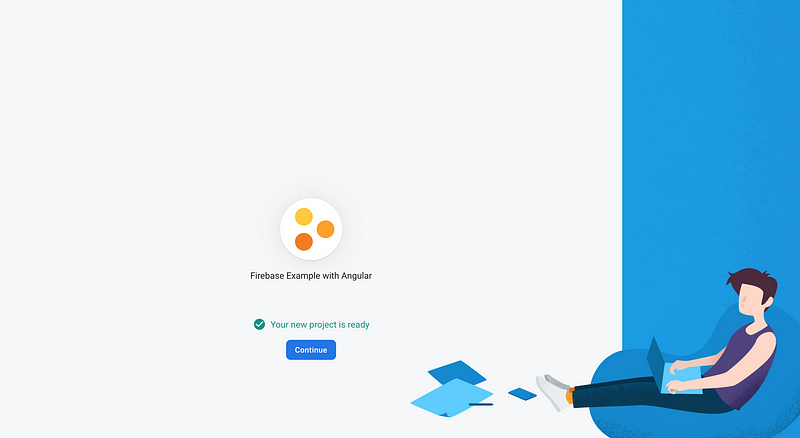
Hooray!
One thing I really like about Firebase is the Dashboard. It’s a small thing, but it’s so easy to use and it really makes the experience that much better.
Setting up Authentication
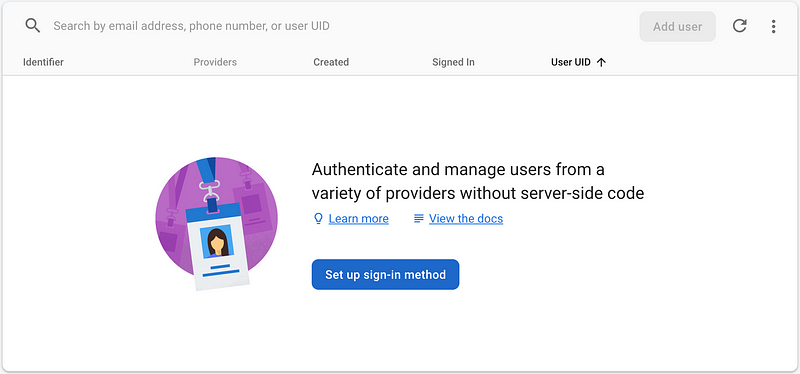
The first thing we want to do is navigate to the Authentication tab and then we’re going to set up some sign-in methods.
The first one I want is going to be the email and password.
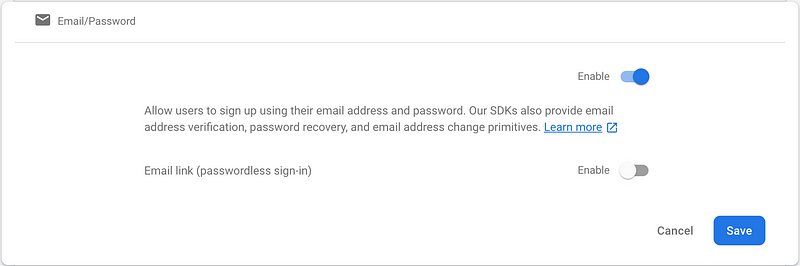
If you’re curious about what passwordless sign-in is, I’ll take a minute here to explain. Basically what happens is the user signs up only with their email address. Firebase will then send the user a link via email to verify their email address. Once their email address has been verified they will be able to sign in. So now the user can go to your app, put their email address in, and then Firebase will send them an email with a special link. This link contains an authentication code that will be different every time. Once the user clicks on that link then they will be authenticated with Firebase. It’s a really awesome sign-in method that I will probably end up doing another article on.
The next sign-in method I want is Google sign-in.
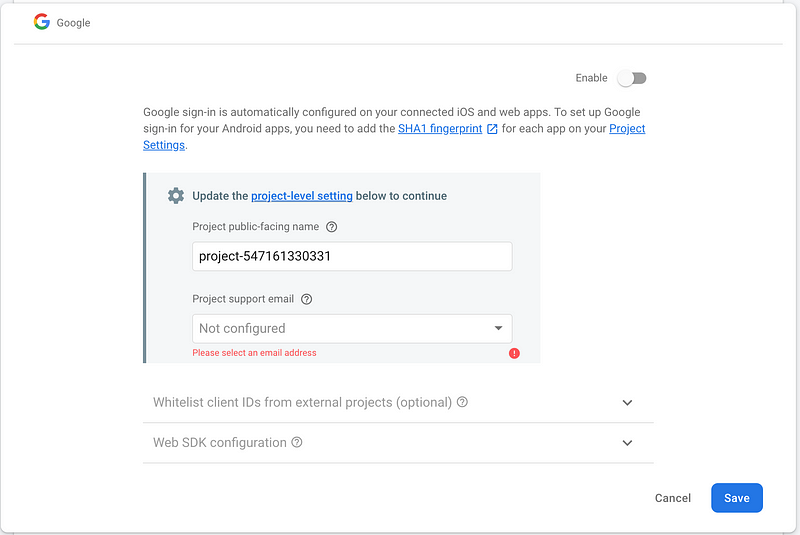
In order to set this up, you’ll just have to select your email address from the drop-down and click Save. Now your sign in providers are set up and we’re ready to build some user authentication.
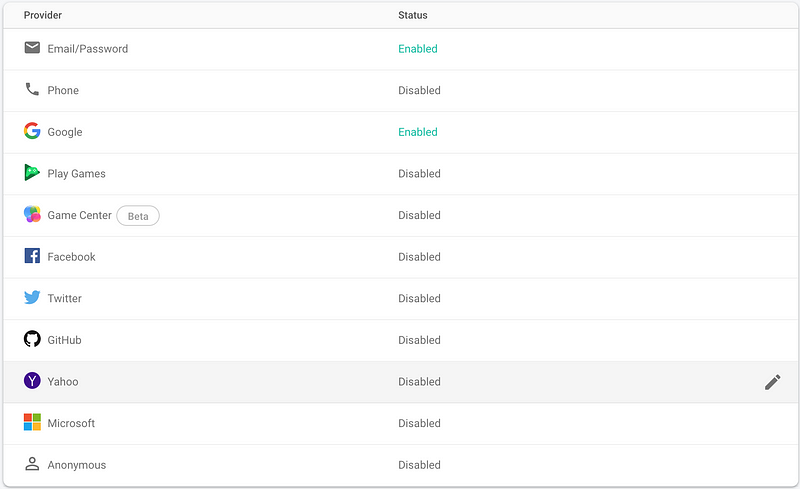
I won’t be going into every authentication method here, but as you can see there are quite a few. If you want to set those up Firebase gives you pretty clear instructions on how to do that and makes the whole process blindingly easy. You’ll see once we start to build the Google auth flow, the other sign-in providers will be basically the same.
The Database
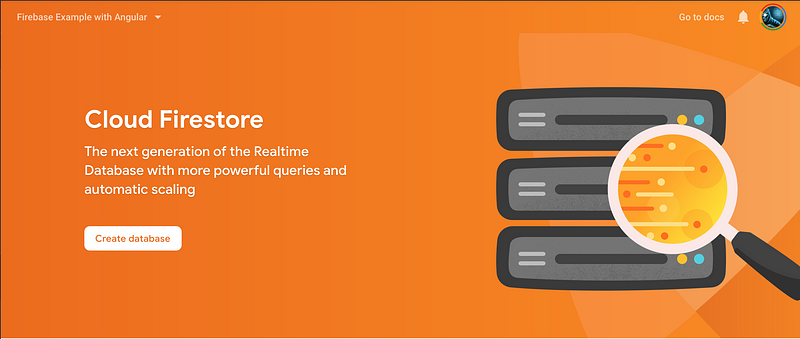
For this project, we’re going to use Cloud Firestore, which is Firebase’s highly scalable NoSQL document store. To create a Firestore instance we’re going to navigate to the Database tab under Develop on the side-nav. Then we’re going to click the Create database button. You’re going to see this modal come up:
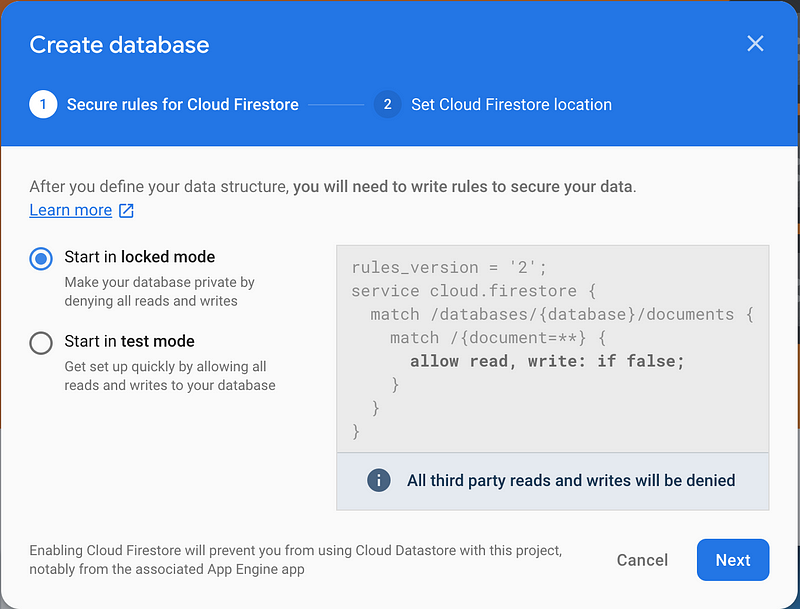
This is referring to Firestore’s rules, and we’ll talk about those in a second, but you can find the documentation here. We’re going to keep it defaulted to locked mode for now, which basically means no one will be able to read or write any data to the database. Don’t worry we’ll change that a little later on.
The next thing we have to do is select which region we want Firestore to run in.
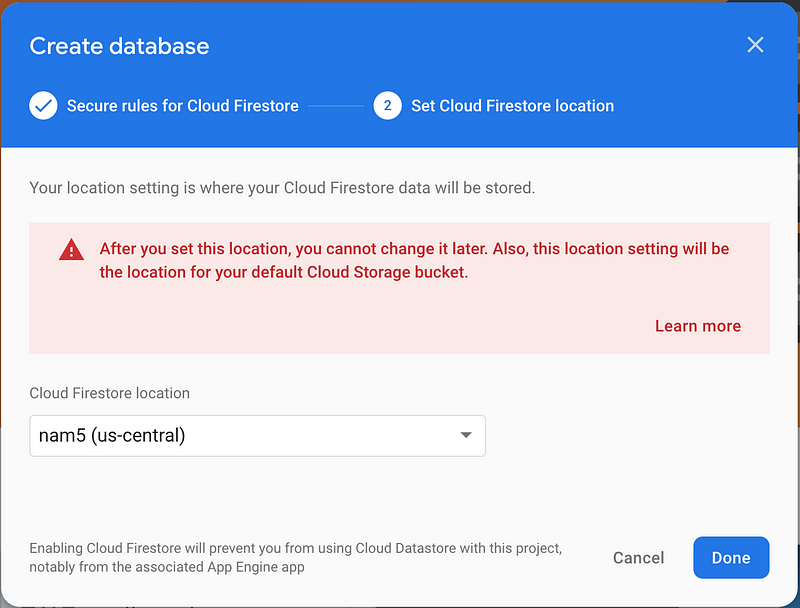
I’m going to keep us-central for now, but you can choose whatever region you’d like, but do heed the warning in the modal. If you’re new to all this and just starting out, I wouldn’t pay much mind to the location it won’t make a difference in your life. So now we have our database (mostly) set up and we can move on to the actual application.
Recap
In this article, I talked a little bit about what Firebase is and we went through the dashboard and setting up our project. If you have any questions regarding the Firebase dashboard or setting up your project I will be happy to answer them.
In the next article, I will go over setting up the Firebase CLI and setting up Firestore Rules.