
Angular and Firebase — The Perfect Pair: Part 5

In the last part, we set up our data models and integrated them into our Angular app. If you need to catch up you can read the last part here. In this part, we’re going to start using our services to build sign in and sign up pages so users can sign up for the app.
Angular Material

Before we start with any code, I’m going to need a little help. I’m not much of a CSS wiz so I’m going to install the Angular Material library to help me out. If you’re unfamiliar with Angular Material you’re in for a treat. It is a component library for Angular that includes all the components you’ll need to create a full application. As the name implies, it provides you with drop-in components that implement Google’s Material Design. Google is the pioneer of Material design so it’s exciting to be able to use a library created by Google implementing its own design principle.
I’m also going to use the Teradata Covalent add on for Angular Material. The Covalent library gives us a few things that the basic Angular Material library does not, and it’s honestly a nice add on to use.
To get started we need to install 4 packages.
npm i -s @angular/material @angular/cdk @covalent/core hammerjs
Next, we’re going to import hammerjs into the main.ts file.

After that’s done we need to import BrowserAnimationsModule in app.module.ts.
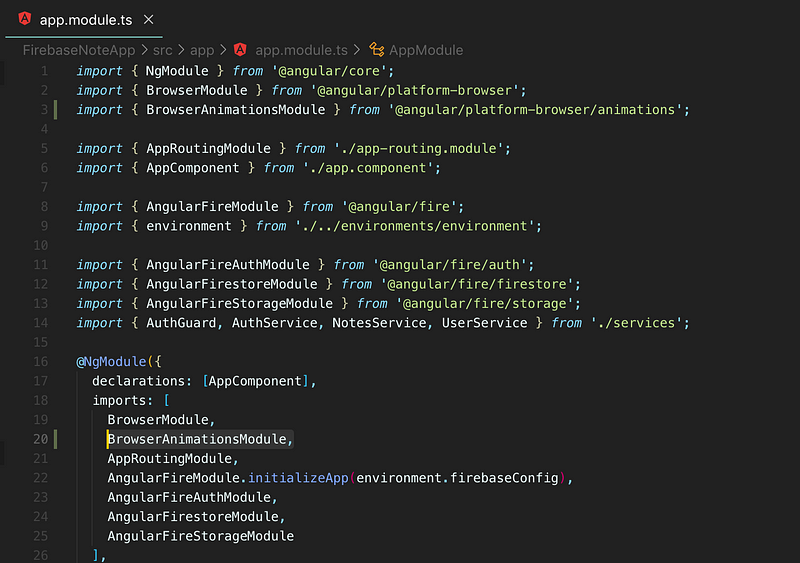
Theming
Angular Material and Covalent give us some killer theming mechanisms.
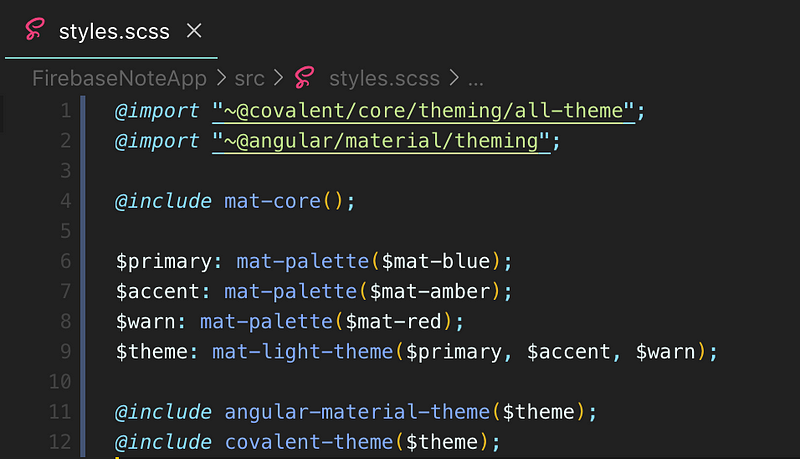
By integrating the material and covalent theme using the built-in Angular Material color schemes we now have a global theme in 12 lines.
The last thing you have to do is import the Covalent platform styles in your angular.json file.

If you forget to do this then none of the Covalent stuff will work!
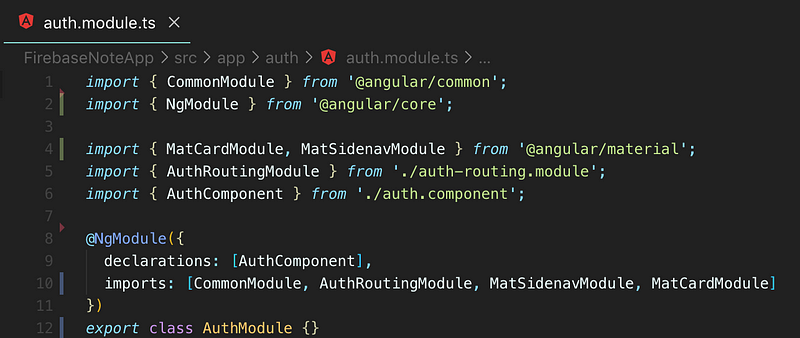
The Auth Page
Right now we have this Auth page that has a router placeholder for the sign-in and sign-up pages. We are going to style the auth page in a way that will render these two pages inside a card.
First, we’ll have to import the MatSidenav and MatCard modules in our AuthModule
Then we can go ahead with our layout and the styles.
auth.component.scss
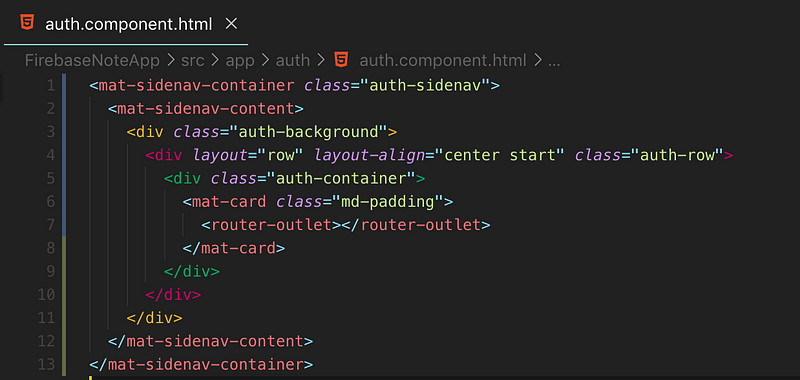
Now we get this nice placeholder for our auth routes
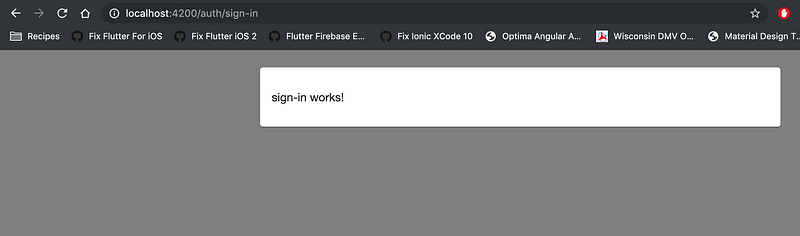
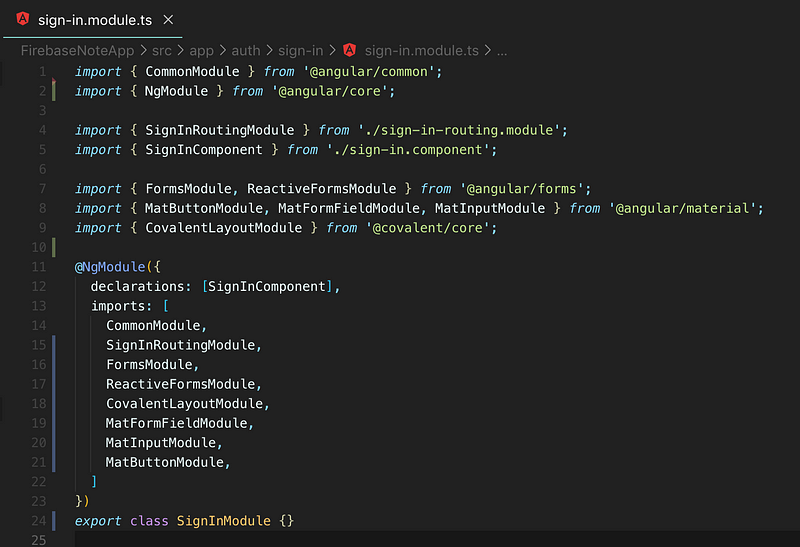
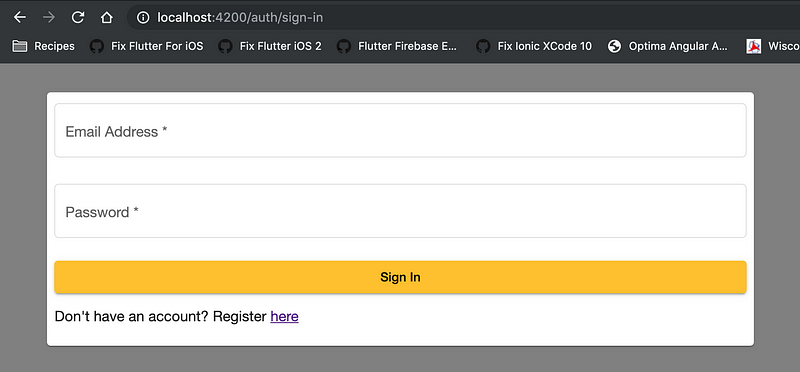
The Sign In Page
Angular has some pretty awesome built-in form handling mechanisms, which we’re going to use quite a lot. Before we can use any of it, we have to import all our modules into the sign-in.module.ts
Then we’re going to layout a blank sign-in form
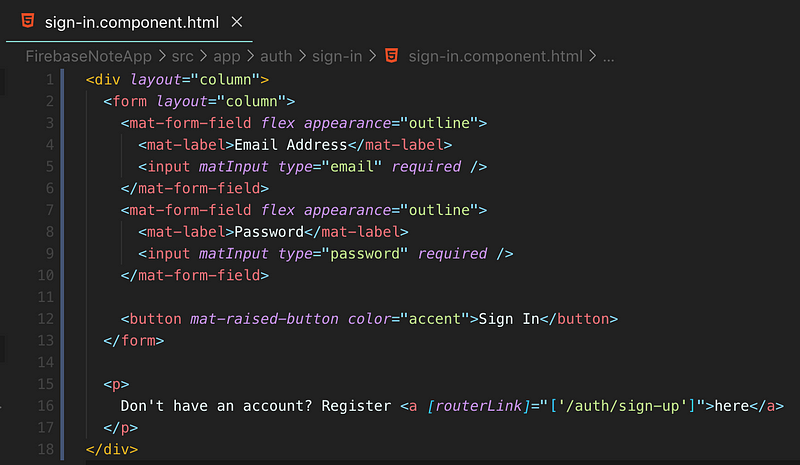
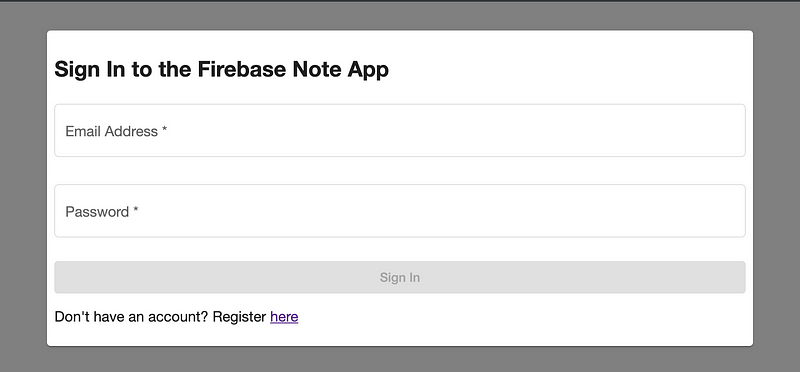
Now we have something resembling a proper sign-in form with a link to sign up.
Now that we have a nice form it actually has to do something. To do that we’re going to use FormGroup and FormControl from Angular’s core library.
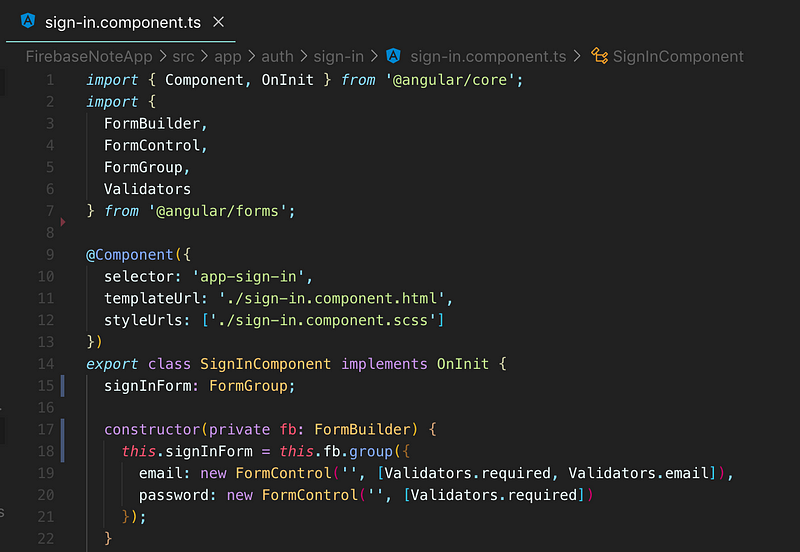
Now we can integrate that into our form.
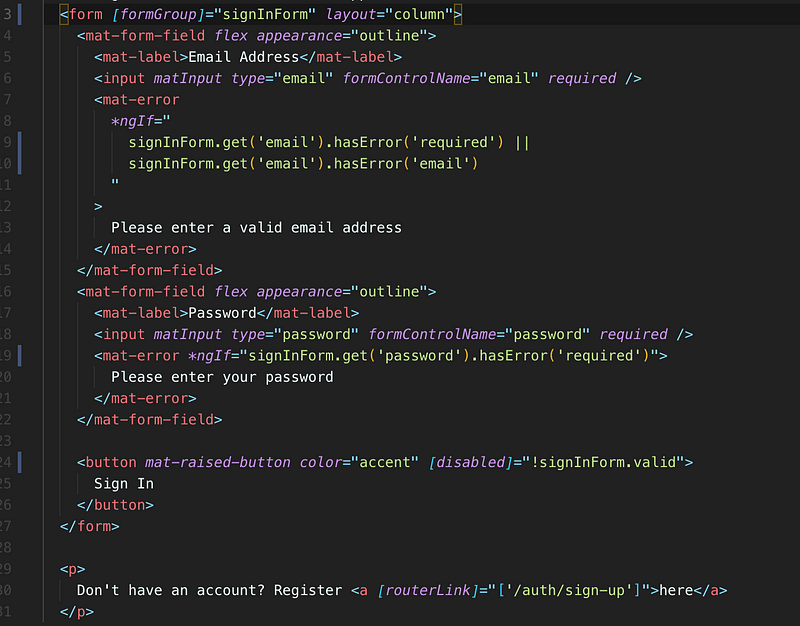
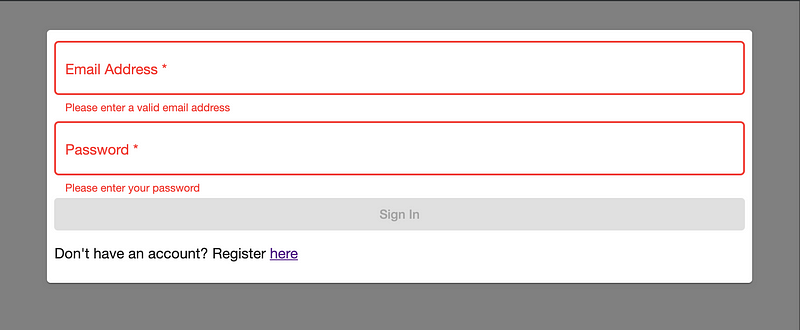
You can see that we have added visual error for the user as well as disabling the sign-in button before the user has entered all their information.
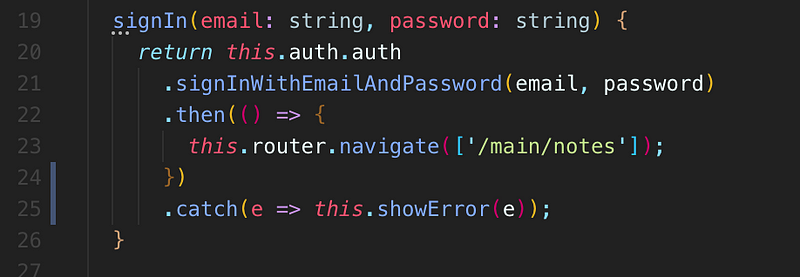
Lastly, we need to have a method that takes all this information and send it to our AuthService.

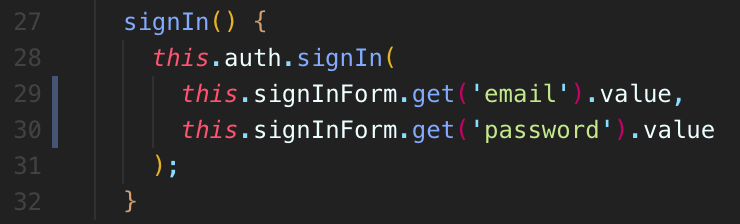

The only thing we really have to do is import the AuthService in the constructor and Angular’s dependency injection will take care of the rest for us. Now we’re clear to pass in the email and password to the signIn function and then tack on the submit method in the form.
Once the button inside the form is pressed it will trigger the signIn function, which will pass the email and password tot he auth.signIn functions, which will call Firebase Auth, and then if the user gives their correct info the auth.signIn function will send the user to the /main/notes page. The last thing we’ll do to this is add a title so users know what page they’re on.
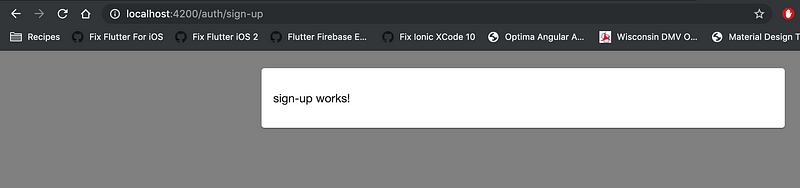
The Sign Up Page
There really won’t be anything different about the sign-up page. There is really only a small difference in the component TypeScript file.
https://gist.github.com/shadow1349/5f64c538ffb3a6badc3200e2fb8fe313
Obviously we’re going to try and get the user’s first and last name, but what we’re going to do is construct an IUser object in the signUp method. If you’ll remember from the auth.service.ts the signUp method there takes an IUser as well as a password so that’s what we’ll give it. You’ll notice immediately that the Id, ProfilePhoto, FCMToken, and CreatedOn are all set as blank. This is because the signIn method in auth.service.ts takes care of setting the Id and CreatedOn for us. The FCMToken and ProfilePhoto really isn’t that much of a concern at the moment.
Error Handling

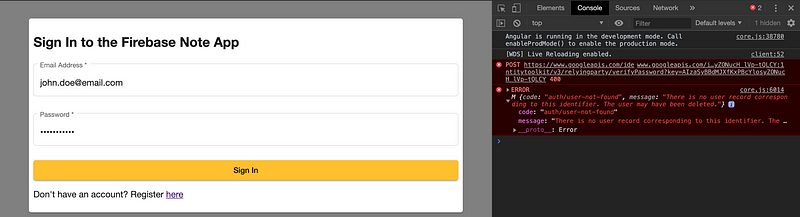
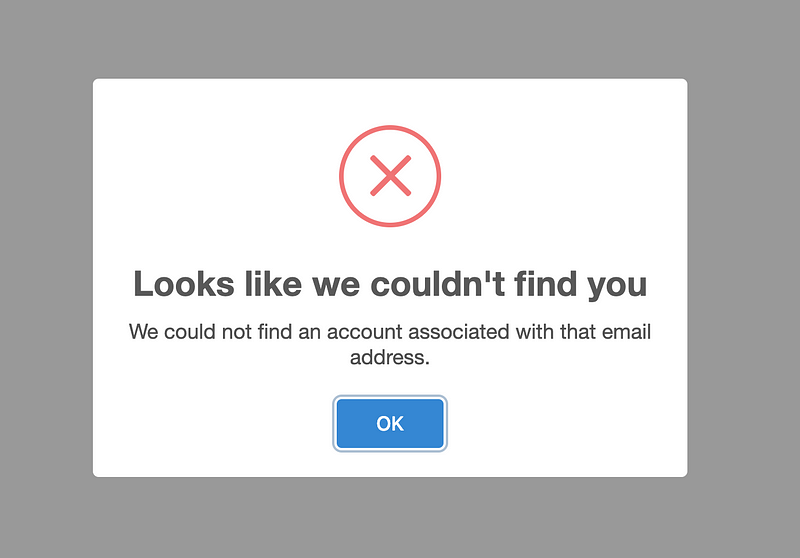
What happens if the user doesn’t enter the right email or password? What we have now doesn’t exactly give good user feedback because it will basically not do anything. This isn’t really the kind of user experience we want, so I’ve devised a universal auth error handling strategy.
Whenever we get an auth error Firebase Auth will send a code and a message.
We can use this to create a file in services/auth directory called errors.ts and it will contain a list of all the error codes along with custom messages for each one.
We’ll also need a nice way to display the errors which is when I turn to SweetAlert. If you’ve never used it before you should start using it. It can be used with vanilla JavaScript, React, Angular, Vue, literally anything. It’s amazing, to say the least. They have a custom Angular implementation but the library itself will work just as well.
npm i -s sweetalert2
Once that has installed we need to include the SweetAlert styles in the styles array in angular.json just like we did with Covalent.

Now we’re all set up and ready to use SweetAlert!
The first thing we have to do is import the custom Errors and SweetAlert into auth.service.ts

Then we need a custom method that will find the error based on the code and display it to the user.
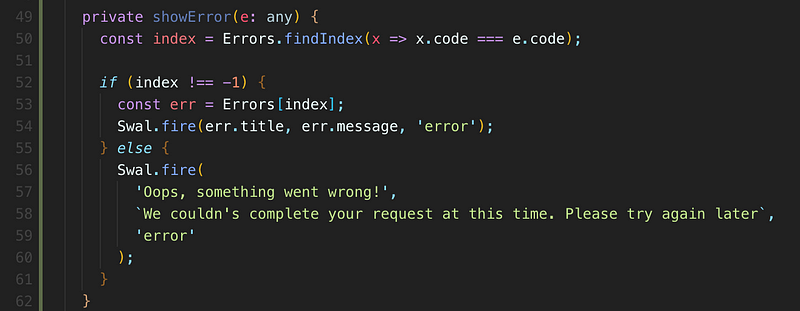
This will try to find the index, and if it can’t we’ll display a generic message. Now we have to implement it in the catch methods.
Basically all we have to do is add that catch at the end of all the Firebase Auth methods and we’re good to go! Now when something goes wrong with auth the user will get this
Summing it up
In this article, we covered setting up Angular Material and Covalent for our project so we don’t have to write as much CSS, we set up the sign-in and sign-up pages, as well as added in some error handling. Like always, if anyone has a question I’ll do my best to respond to it.
Stay tuned for the next installment where we will go over how easy it is to integrate Firebase into the rest of our app. We’ll be creating the whole rest of the app so I’ll only be going over a lot of information. All the code will be hosted on the GitHub repository here so you can view it at any time.
Read the final part here.
If you’ve enjoyed this article I’d love for you to join my mailing list where I send out additional tips & tricks!
If you found this article helpful, interesting, or entertaining buy me a coffee to help me continue to put out content!